Re-creating the Ever Ready 800 Battery

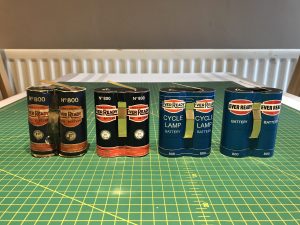
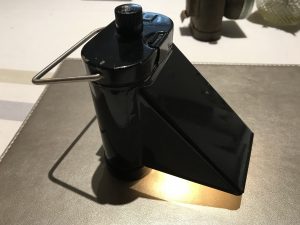
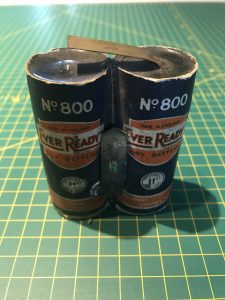
When my Dad and I were at Beaulieu auto-jumble; my dad decided to buy a boxed ARP Lamp from World War 2.  Although he only bought it as a novelty (or dust collector as my mum calls it) we couldn’t help wonder what it would be like working?

WWII ARP Lamp
WWII ARP Lamp

As it turns out they use an obsolete battery type which can’t be purchased these days; the Ever Ready no.800.  After some eBay searching I located an adapter which would take 2 x ‘AA’ cells but my dad felt that was too expensive for a novelty which would only be used once or twice.

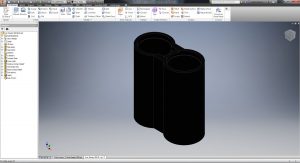
I thought this would be a perfect opportunity to practice designing and building a 3D printed model, so I decided to set about creating my own adapter.

I managed to find an old (I think 1930’s) No 800 battery to copy the dimensions and layout.

Original Ever Ready 800

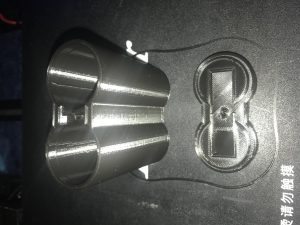
After some research; I found that the ‘800’ battery consisted of 2 ‘F’ cells (the same as the 996 lantern battery), but these are also hard to obtain as individual cells.  ‘D’ cells are the same diameter and adapters were available “back in the day” but there wouldn’t be much space left for a strong, reliable adapter around them.

I eventually settled on using 2 x ‘C’ Cells which are easily available and the alkaline types should give a capacity similar to the original “Dry Cell” type ‘800’.

After a few hours with Autodesk Inventor, I come up with a design ready to 3D print on my Creality Ender 3.

Body Design
Body Design
3D Printing Replica 800

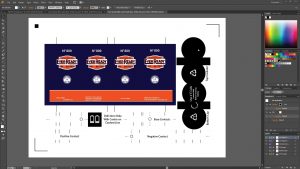
As is often the way with these projects; I could have stopped with a functional adapter but decided to go overboard and print a label to look similar to the original (gaining more experience is never a bad thing, right?).

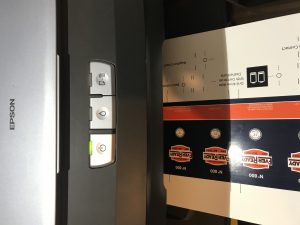
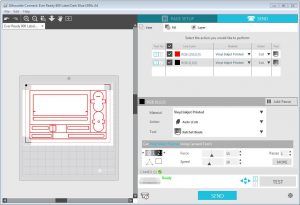
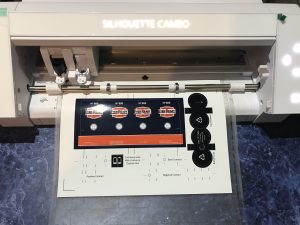
I designed the label with Adobe Illustrator then printed it on inkjet printable vinyl and cut the shape out with my Silhouette Cameo (I use the Silhouette Connect plugin for Adobe Illustrator which allows the cut lines to be output directly from Illustrator rather than having to export and import files).

Ever Ready 800 Label Design
Printing label for 800 Battery
Silhouette Connect
Silhouette Connect
Cutting Ever Ready 800 Label
Replica Ever Ready 800

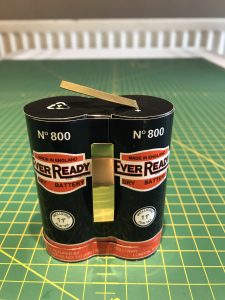
All in all I’m quite happy with the result, I’m selling some on my eBay page if you’re interested in buying one.

Ever Ready 2036 Cycle Lamp Working
Ever Ready 800 Adapters with Original

YK-E2000 CCD Sensor 1D/2D Barcode Scanner Bar Code Reader Update

I used a simple FPC bread-board adapter to confirm that the pin-outs are correct but was far from convenient to use.

After some testing, I found that the module in its default state emulates a USB keyboard outputting the ASCII contents of the bar-code.  The UART pins are completely unresponsive.

“BEEP_OUT” is actually outputting square-wave tones, adding a simple NPN transistor and speaker gives the familiar “Beep” when a bar-code is read.

The “LED_EN” pin is an output for an LED (Active high, 3v3).  A LED with current limiting resistor is all that was required.

The “Trigger” pin as I suspected is for a button to trigger reading, simply pulling this low is all that was required.

After some help and encouragement from Peter at Village Vending I’ve discovered the module is manufactured by Guangzhou Yoko Electron Co., Ltd (Also known as Youku Electronics).  They have several manuals on the website which looked like they might work so I built a more usable breakout board.


Sadly none of the manuals on the website have worked but they did have a technical contact email address on the webpage.  After a quick email I received a reply from their Sales Manager with a copy of the manual which has all of the configuration barcodes needed. M4A E2000A EP2000A MK30 E3000H E3100H User Manual

I have now cleaned up the design and added a USB Type-B connector for convenience.

YK-E2000 CCD Sensor 1D/2D Barcode Scanner Bar Code Reader

I recently bought a “Mini 1D/2D Barcode Scanner Module Bar Code Reader Scan Module Fast Decoding USB” for an upcoming project.

However as is often the case with Chinese eBay items, there was no documentation and a Google search only found other sellers of the same thing.

The only markings on the board are “YK M4A”.  Although I also found reference to “YK-E2000”; there was still no sign of a data sheet or pinout diagram.

After much wrangling, the seller managed to provide me with the pinout diagram to actually connect the thing up (The note for pins 13 & 14 said “Note: These pins are grounding pins to stabilize both sides of power strip” which I think actually means that they are the mechanical support for the connector).

The connector is a 0.5mm pitch FPC with a 60mm flat flex cable provided.  I am now waiting for a connector and breakout board so I can test it (and find out if both the RS232 TTL and USB are enabled together or if the firmware only provides one or the other).